Garlic Guide
Garlic is one of the easiest root vegetables to grow. For the best success of a bountiful harvest there are some factors that are important. These factors include location, soil, drainage, spacing, fertilizing, and quality of seed garlic. We’ve got you on quality garlic but let us also help you get your set up just right.

Location
Garlic ideally needs 6 to 8 hours of direct sunlight a day, so plant your garlic in full sun. Your spot should have well-draining soil. If it does not have drainage, water will sit and rot the roots. If that happens, the seed could potentially die. To promote drainage, add material such as perlite, mulch, vermiculite, or compost. Some people think that adding sand will help create drainage. The problem with sand is that it doesn’t retain nutrients so avoid using it. Don’t take a short-cut and plant your garlic directly in the soil. Well-amended soil is required. Amended soil goes hand in hand with drainage. Compost is key and not only beneficial for drainage but promotes microbiome. For homesteaders and home gardeners raised garden beds are popular. Garlic can thrive in either the ground or a raised bed with the correct adjustments.

Spacing
Now you have the perfect location, but how do you space your garlic for the best yield? You don’t want to be patiently waiting months for a bountiful harvest only to find puny sized bulbs. Cloves need to be planted at least 2”-4” deep and 4”-8” apart. If you are growing larger varieties, like our Elephant garlic, then you need to plant 4”-6” deep and 6”-12” apart. Remember one clove grows into an entire bulb so space is important! Each new harvested bulb contains on average 10-12 cloves. For larger garlic types there could be as little as 4 cloves. According to the Old Farmer’s Almanac, a single 10’ row yields approximately 5 pounds of garlic. Use this information to gauge the amount of garlic cloves you need to grow the size harvest you want.

Fertilizing
Feeding your garlic plants is significant because they are long season crops. Depending on variety, your garlic can take up to 210 days to mature! Your original compost, which we already discussed, will initially feed the plants. Fertilization should start occurring in the spring and should be applied every 3-4 weeks until May. Garlic plants love nitrogen and fertilizers containing blood meal are best. Also, keep the garden weeded as weeds can extract the nutrients intended for the garlic.

Timing
Garlic is mostly grown in the fall for a summer harvest. You can do spring plantings, but you will not harvest large garlic bulbs. When planting in the fall, garlic plants start to establish roots before the frost. Garlic should be planted 6-8 weeks before the first hard frost in your location. This allows enough time for the roots to become established. Garlic needs a dormant period that includes being exposed to cold temperatures. This process is called vernalization. (This process is like cold stratification though the difference is that vernalization is used to promote flower initiation whereas cold stratification is a process used to break seed dormancy). This process happens naturally when you plant in the fall but if you want to plant in the spring you will have to mimic the process. Soft neck varieties don’t need vernalization, but if you want to plant hard neck varieties then you will need to trick the seeds by putting the garlic in the fridge for 2-3 weeks. Some garlic is sold with the cold exposure already, so make sure you pay attention when buying. If the garlic doesn’t experience this mock vernalization, it will not form bulbs but will produce a single clove bulb which is known as a round. There is nothing wrong with this grown garlic, you can still eat it and then plant it come the fall. Regardless, if you spring plant, the bulbs will always be smaller compared to fall planted garlic. The positives about spring planting are if you have hard neck garlic you will get garlic scapes which are becoming very popular in cooking. Garlic scapes are the tender stems and flower bud of the hard neck garlic bulb.

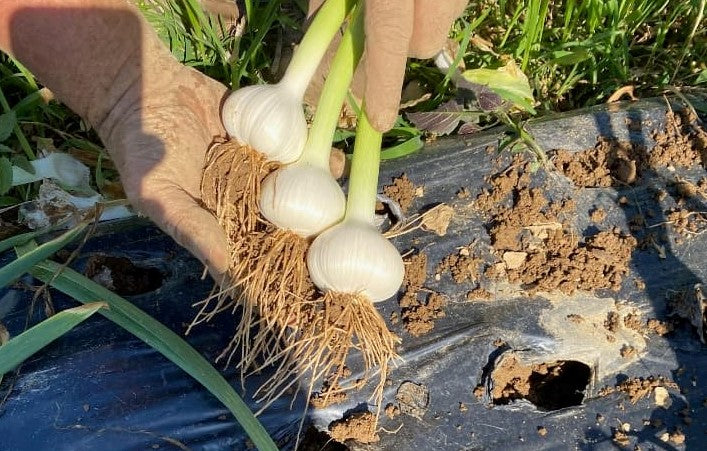
Harvesting
Knowing when to harvest your garlic is easy: the leaves will yellow and die around the bottom of the stem. Garlic have layers of leaves which indicates how many layers of wrappers surround the bulb. Typically, you want half the leaves to be green and half to be brown. When you notice this in your garden, stop watering. Give it a week and then you are good to pull the bulbs up. Drying them out before harvesting creates an easy harvest and prevents rot. After harvesting, the bulbs need to be cured for storage. To cure, clean the bulbs, then sit them in the sun, make sure there is good airflow, and keep them dry. You’ll do this for 2-3 weeks. However, if you want to eat the garlic immediately, enjoy without curing! Curing the garlic will develop more flavor in the bulb.

Storing
When storing garlic, moisture is your enemy and will cause rot. Do not put bulbs in airtight containers, in plastic bags, or in warm environments. Ideally you want airflow, temperatures between 60-65 degrees, and a dry storage area. Storing in containers made of mesh or paper will help prevent rot. A popular way to store garlic is braiding the stems of softneck varieties and hanging them up on the wall or on shelves. Do not separate the heads of garlic when storing them. You also do not want to remove the protective paper layers away from the bulbs. If you have an abundant harvest, you could also freeze or dehydrate as well. For freezing, you mince the garlic, put it in an ice cube tray, then top it with oil. They create the perfect portion that you can throw in any meal. To dehydrate, cut your garlic the ways you want, depending on the use. Once it’s dehydrated, store it in an airtight container to use for months!

Enjoy your garlic!